- 1 Real-Time Communication: WebSockets support long-during two-way communication between the client and the server; it supports real-time data transfer unlike the conventional use of HTTP.
- 2 Versatile Uses: WebSockets are the most effective in the contexts of using real-time data, for instance, stream data, games, collaborating platforms, and financial services since they use minimal resources and the time latency is minimal.
- 3 Implementation Steps: WebSockets uses a few layers which are created with the help of a server in Node. for example, js, installation of requirements, setting up of the WebSocket server and enabling real time communication, as well as creating a basic HTML page for use in communicating with the WebSocket to send and receive messages.


Overview of WebSockets
WebSockets offer a persistent connection between client and server that enables real-time communication. They provide a standardized way of sending data from the server to the client and vice versa. Unlike HTTP , they do not require the client to repeatedly request data from the server.
What are WebSockets?
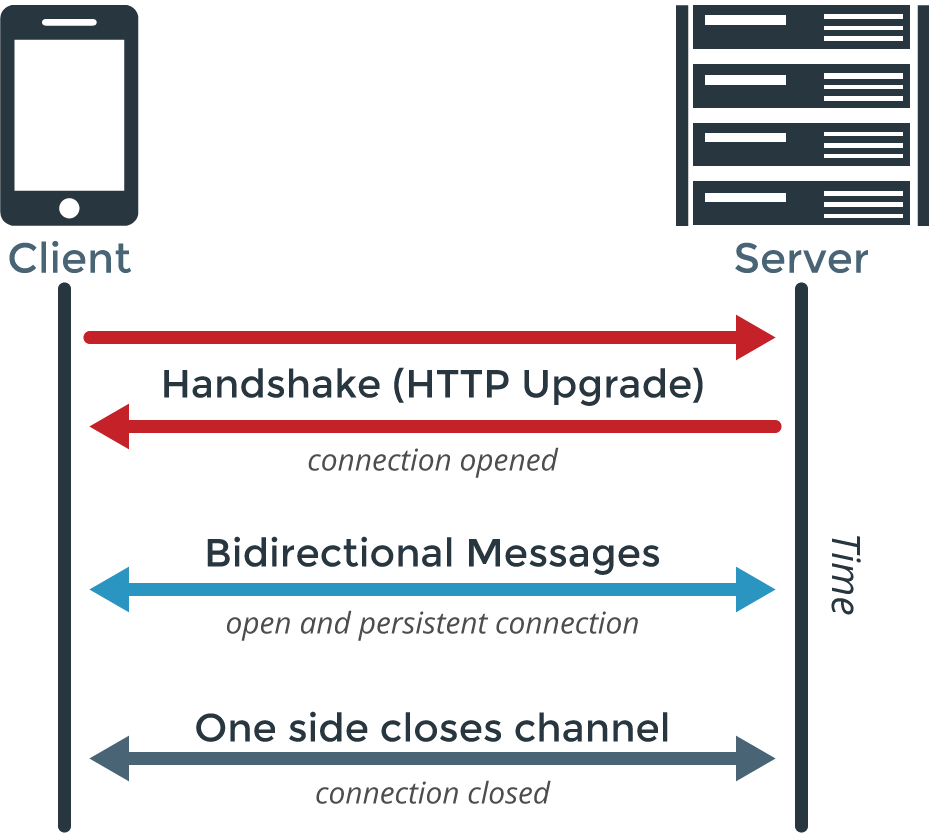
It is a communication protocol with full-duplex communication channels on a single TCP connection between a server and a client. This protocol utilizes a ‘handshake process’ to establish a client-server connection wherein both parties can communicate and receive data. The protocol is implemented as a JavaScript API in web browsers. It can be used with server-side programming languages like Node.js.
It allows real-time, two-way communication between a web browser and a server, enabling the server to send data to the browser without requesting it explicitly.
What are the uses?
WebSockets are a communication protocol that provides full-duplex, bidirectional communication channels over a single, long-lived connection between a client (usually a web browser) and a server. Unlike traditional HTTP requests that are request-response based and stateless, Web Sockets allow ongoing, real-time communication between the client and server. Here are some common use cases for Web Sockets:
- Real-Time Web Applications
- Gaming
- Live Data Streaming
- Collaborative Applications
- IoT (Internet of Things)
- Online Auctions and Bidding
- Customer Support and Help Desks
- Live Dashboards and Monitoring
- Financial Applications
- Voice and Video Calls:
How do they work?
In a nutshell, working with WebSockets involves three main steps:
- Opening a WebSocket connection. The process of establishing a WebSocket connection is known as the opening handshake, and consists of an HTTP request/response exchange between the client and the server.
- Data transmission over WebSockets. After a successful WebSocket handshake, the client and server can exchange messages (frames) over a persistent WebSocket connection. WebSocket messages may contain string (plain text) or binary data.
Closing a Web Socket connection. Once the persistent WebSocket connection has served its purpose, it can be terminated; both the client and the server can initiate the closing handshake by sending a close message.
Advantages of WebSockets
- Bi-directional communication
- Real-time data transfer
- Low latency
- Scalability
- Efficient use of resources
Set up your project environment
- Setup the project
Create a new directory for your project and navigate to it:
1 2 3 | mkdir websocket-project cd websocket-project |
- Initialize the Node.js Project
Initialize a package.json file for your project:
1 | npm init -y |
- Install Dependencies
Install the required dependencies for the server using:
1 | npm install express ws |
- Create Server Code
Create a server.js file and open it in your preferred text editor:
touch server.js
Add the following code to set up an Express server and WebSocket integration:
5. Create HTML User Interface:
Create an index.html file and open it in your preferred text editor:
touch index.html
Add the following HTML code:
Here is the file structure for the app
websocket-project/
├─node_modules/
├─ server.js
├─ index.html
└── package.json
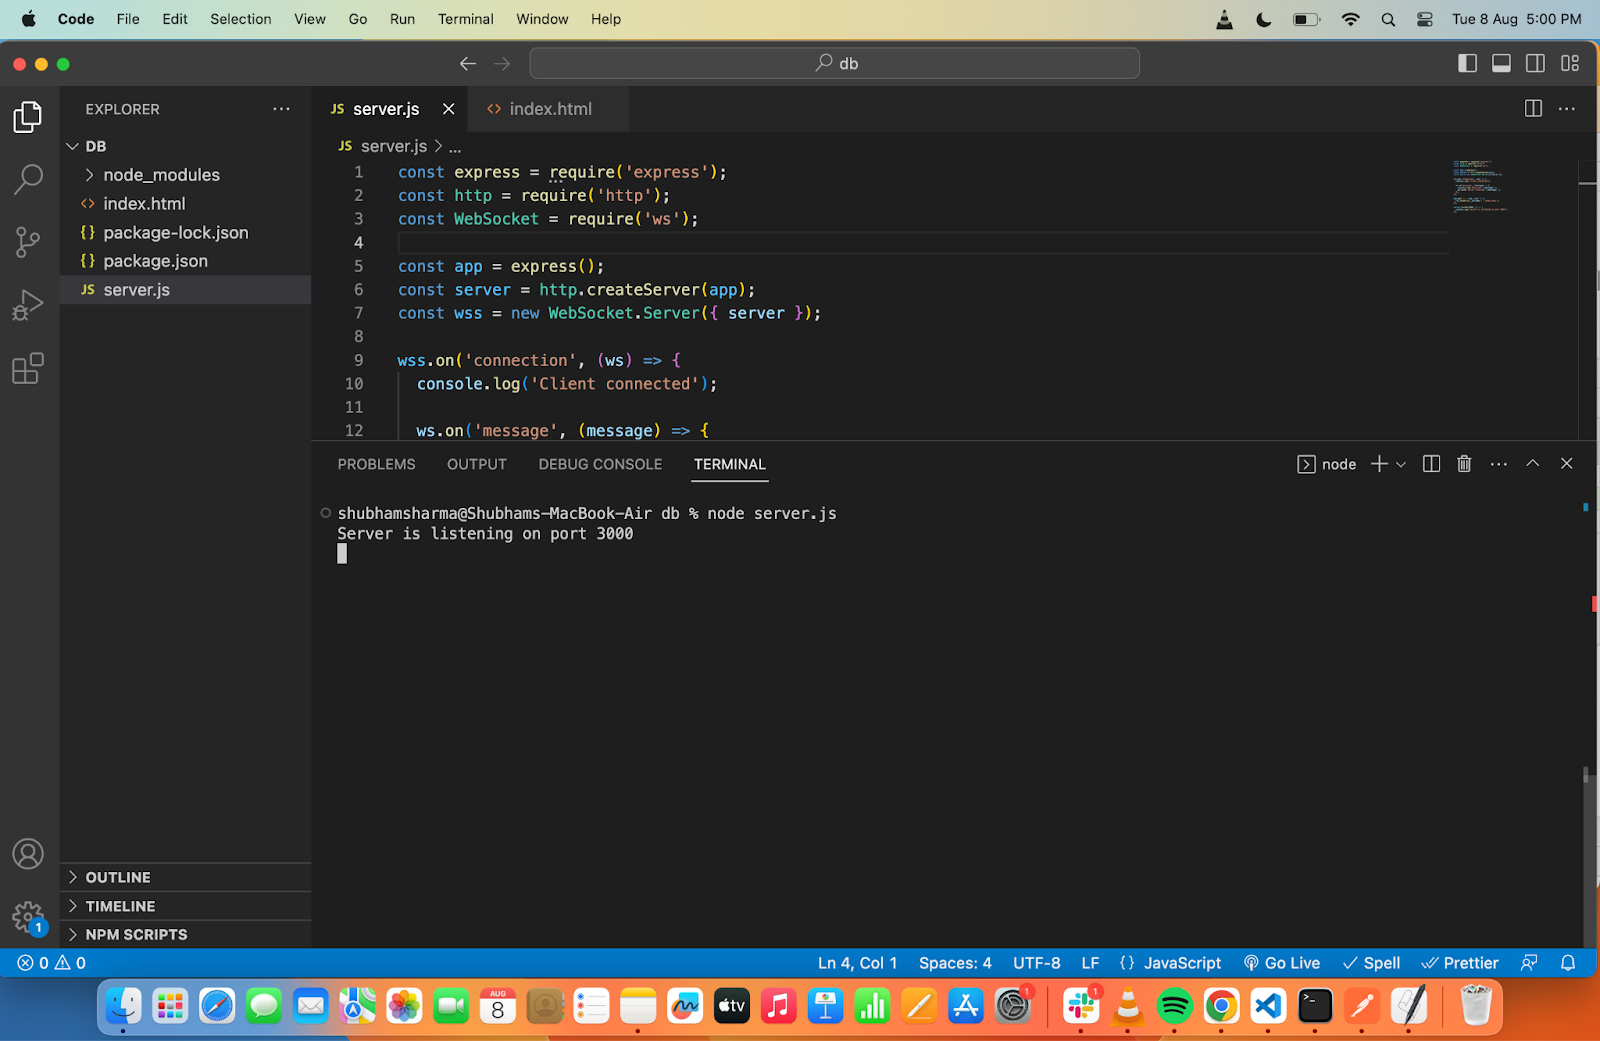
6. Run the Server
Start the server by running
node server.js
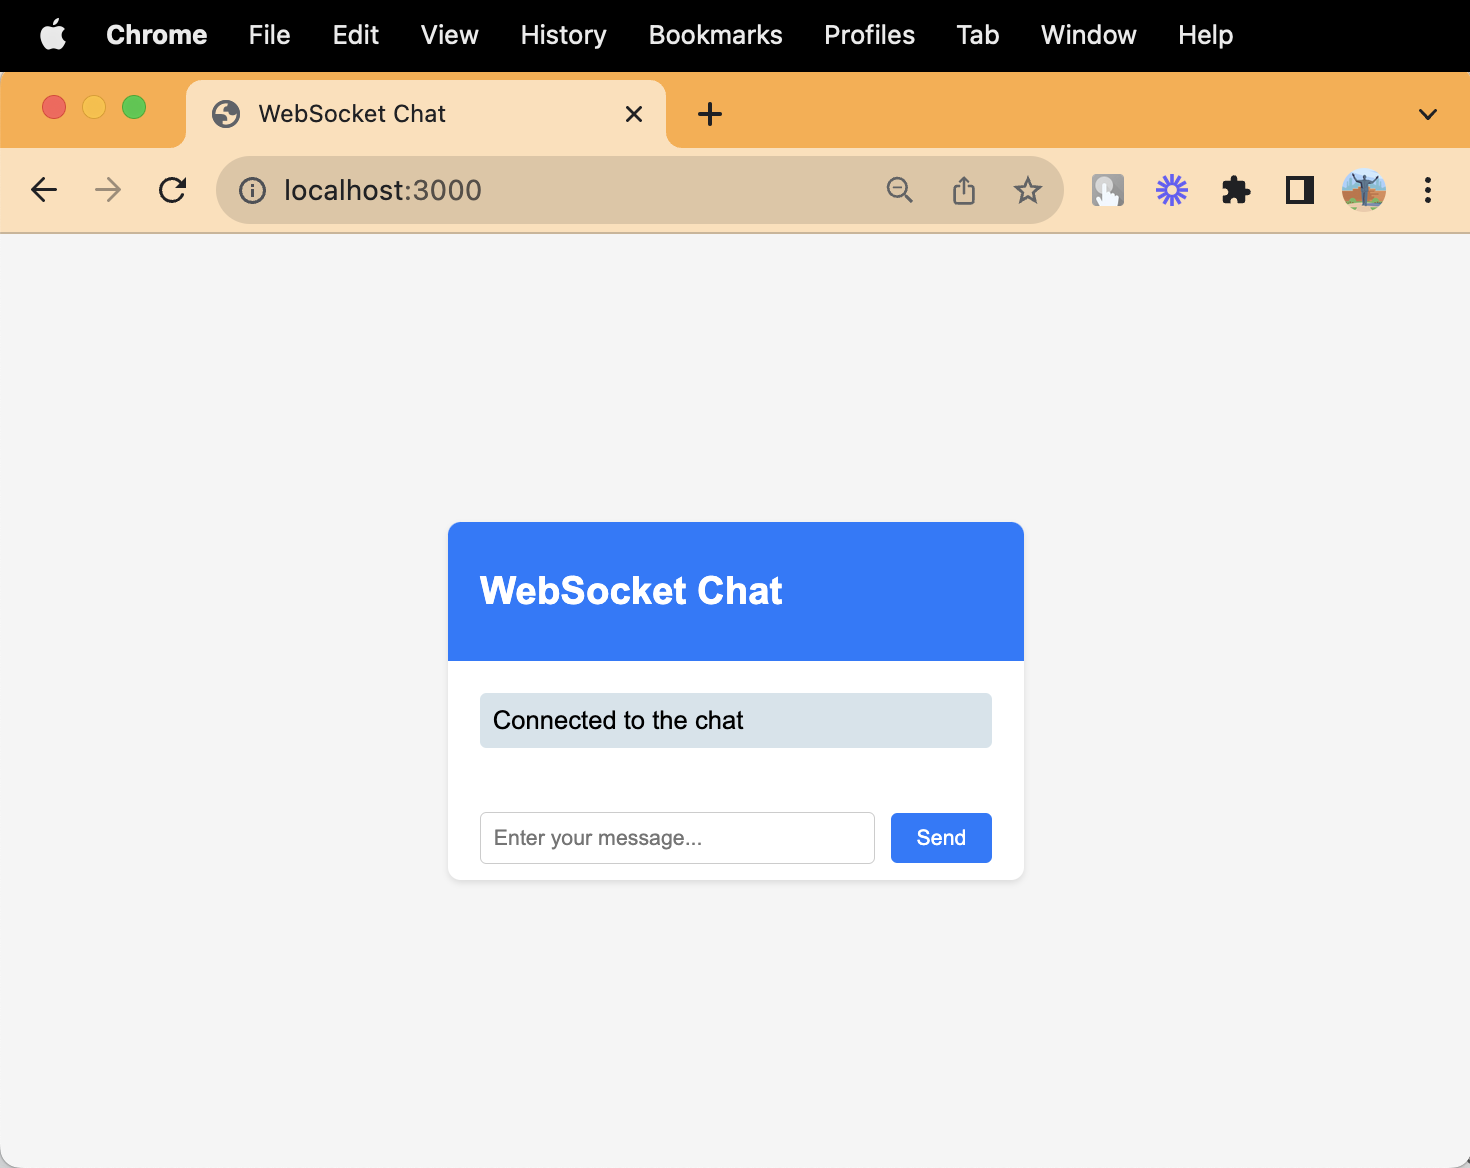
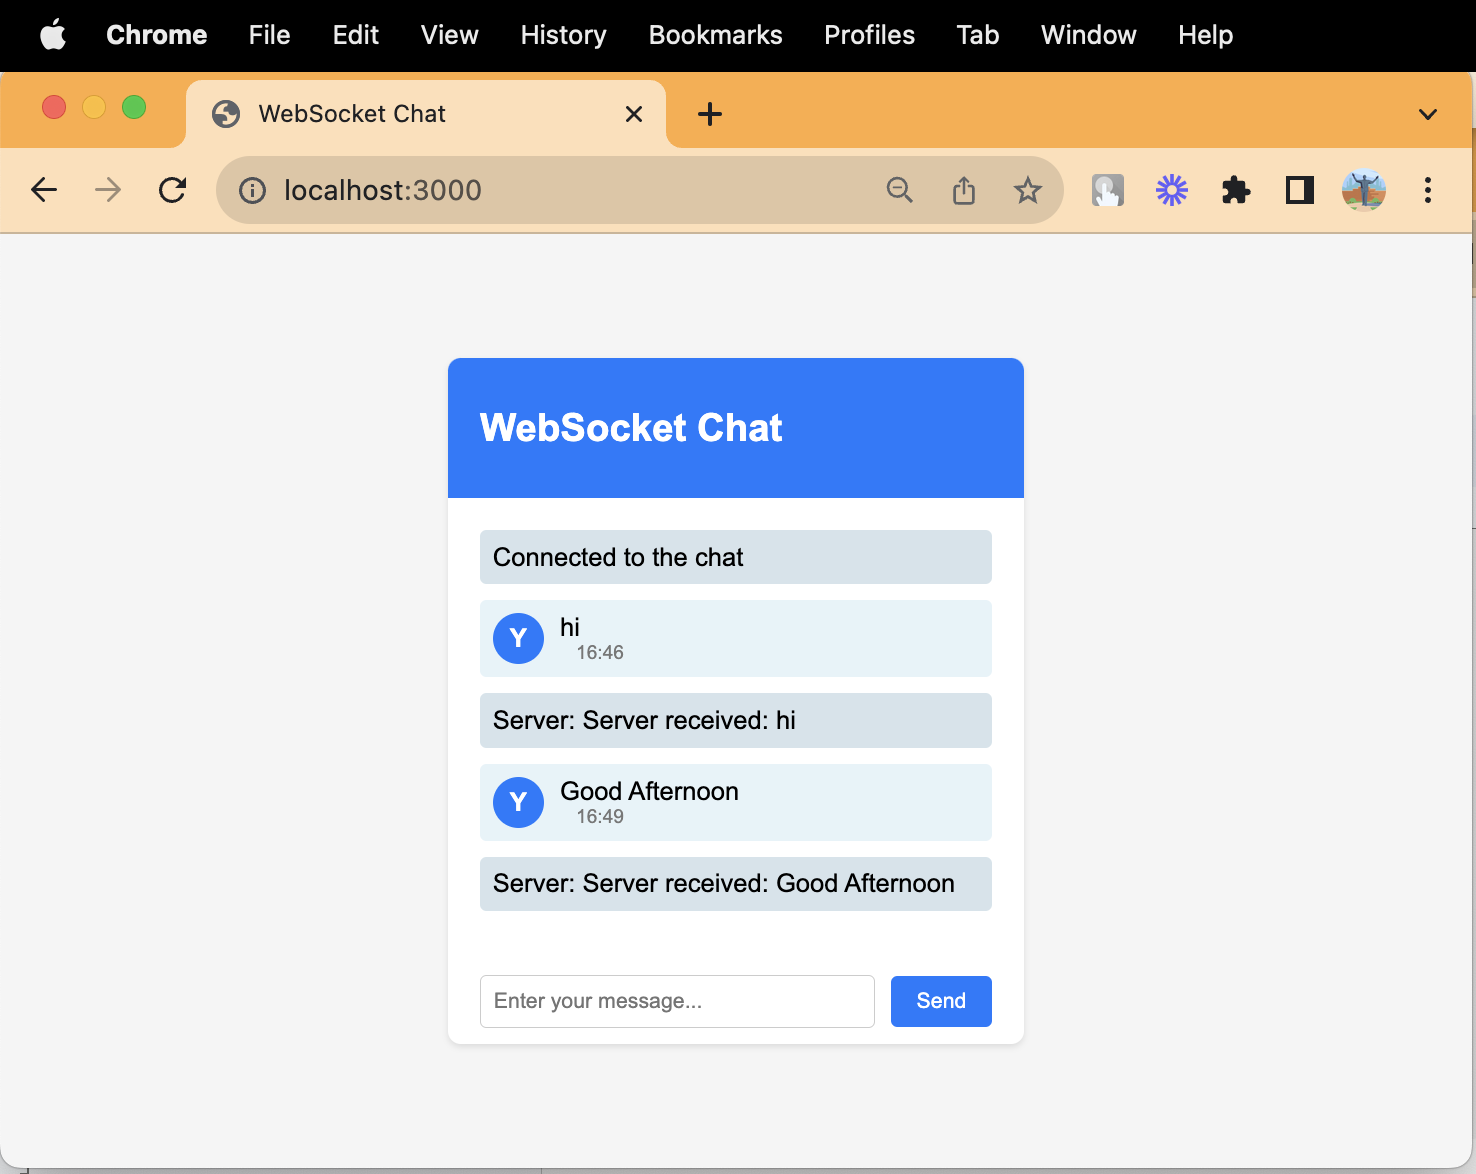
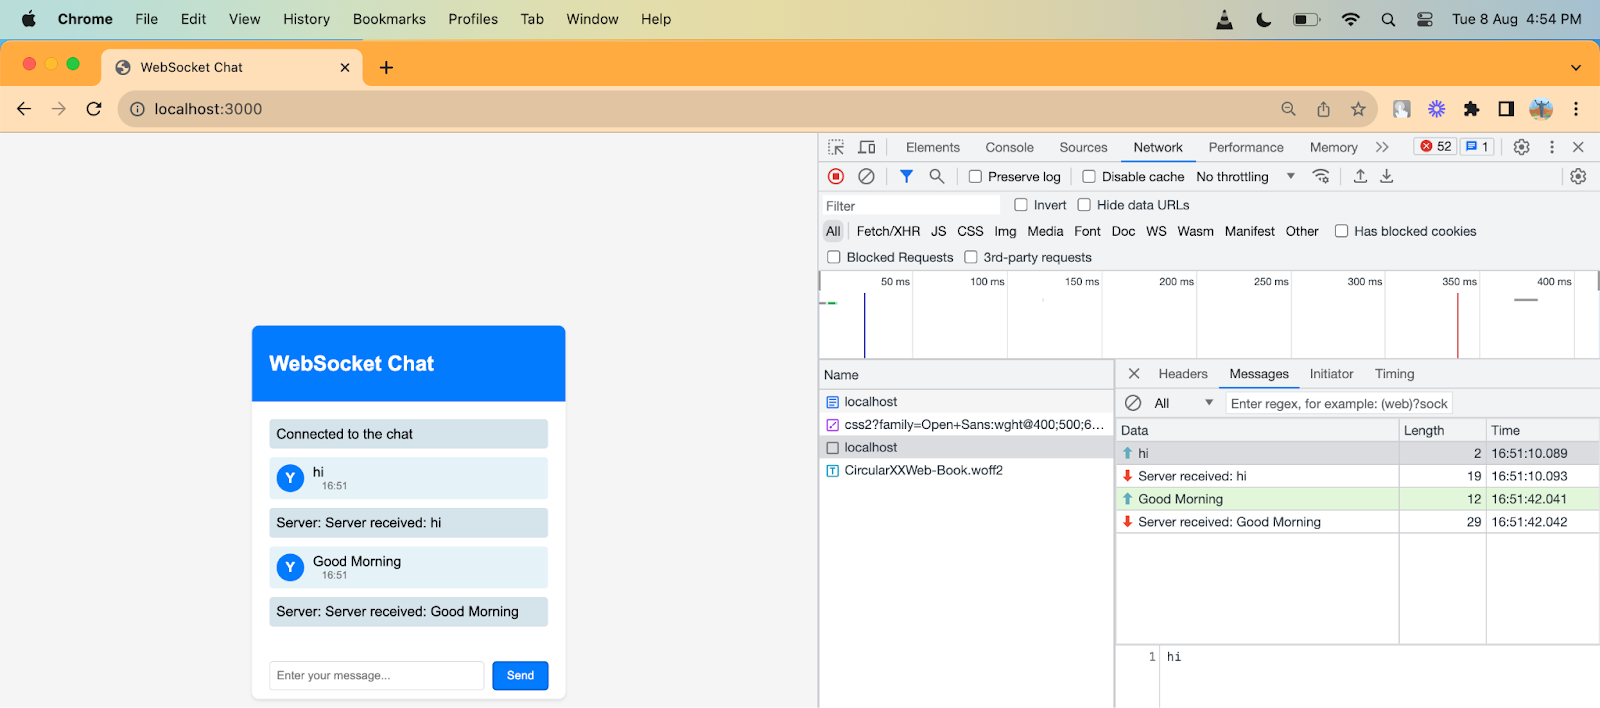
7. Access the User InterfaceOpen a web browser and navigate to http://localhost:3000. You should see the simple UI with an input box and a “Send” button. Messages sent from the UI will be echoed back by the server and displayed on the page.