

- 1 Enhanced Security with MFA: The use of Google Authenticator along with Multi-Factor Authentication (MFA) contribute highly effective and reliable security in React applications to prevent hacking and theft.
- 2 Simple Integration Process: Thus, the utilization of Google Authenticator in a Spring Boot project entailment, and it is relatively easy to strengthen application security since it includes matters such as the addition of dependencies, the generation of secret keys, the creation of the QR code, and the TOTP verification.
- 3 Broad Applicability: MFA is needed in a number of industries, starting with the financial one and ending with healthcare software development, as it offers an efficient tool to enhance safety and ensure proper user identification.
In today’s digital landscape, securing user accounts is critical. Cyber threats and data breaches keep rising, and traditional username-password authentication is proving increasingly vulnerable.
Google Authenticator is one popular MFA method. It’s a time-based one-time password (TOTP) generator that adds a layer of security beyond just a username and password.
Spring Boot is a common choice for building enterprise Java applications, thanks to its solid architecture and built-in security tools like Spring Security. But Spring Security alone only covers the basics — session management and simple authentication.
Adding a full two-factor layer takes careful planning. You could build the TOTP logic from scratch, or use a specialized library. Given the cryptographic complexity and strict timing rules of TOTP, using an established SDK is the safer, recommended path.

What is MFA?
Multi-factor authentication (MFA) is now essential in industries like financial software development and healthcare software development. As custom software in these sectors grows, so does the need for strong security.
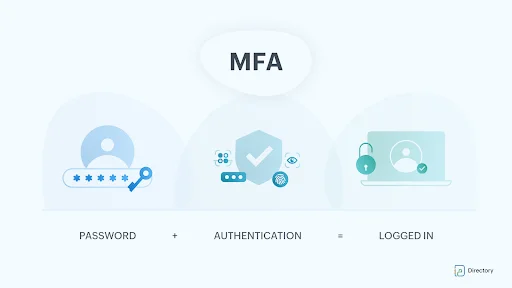
MFA — often called two-factor authentication (2FA) — adds a second layer of identity verification. Instead of relying on just a password, users must confirm their identity through an additional method.
Google Authenticator is one of these additional factors. It generates one-time passwords that are unique to each login attempt and expire quickly.
Why is MFA Important?
MFA strengthens security by requiring more than just a username and password. Passwords alone are risky — they can be stolen or cracked through brute-force attacks. Adding a second factor, like a fingerprint or hardware key, makes it much harder for cybercriminals to break in.
MFA and Regulatory Compliance
MFA isn’t just good practice anymore — it’s often required by law. Common frameworks include:
- GDPR (Europe)
- HIPAA (healthcare)
- PCI-DSS (payment processing)
These all mandate or strongly recommend MFA to protect sensitive data. The threat landscape has changed too. Credential stuffing attacks — where hackers reuse leaked passwords across thousands of sites — are extremely common today. MFA neutralizes this threat. Even if an attacker has a valid password, they’re still blocked without the user’s second device.
How Does MFA work?
MFA works by requiring an extra piece of verification. One-time passwords (OTPs) are the most common example — those 4-8 digit codes sent by email, SMS, or a mobile app.
OTPs refresh at regular intervals, or whenever a login is attempted. The system generates each code using:
- A seed value assigned when the user first registers
- A second factor — like a counter or the current time
Why the Seed Value Matters
The seed value is essentially a master key, unique to each user. If it were exposed, an attacker could clone the user’s authenticator app and generate valid codes forever.
Because of this risk, seed values must be encrypted at rest using strong standards like AES-256.
During verification, the server briefly decrypts the seed in memory. It calculates the expected HMAC (Hash-based Message Authentication Code), derives the 6-digit code, and immediately wipes the seed from memory.
What is Google Authenticator?
Google Authenticator is an app built by Google to verify a user’s identity. It’s typically used alongside a password to add a stronger layer of protection.
It’s considered more secure than SMS-based codes since it resists SIM-swap attacks. It doesn’t need cellular or Wi-Fi access, and setup is as simple as scanning a QR code.
The Technology Behind It
Technically, Google Authenticator uses the TOTP algorithm defined in RFC 6238. This is an extension of the HOTP (HMAC-based One-Time Password) algorithm.
The key idea: TOTP uses the current Unix time as its “moving factor,” instead of a sequential counter.
Since the server and the app share the same secret key and the same current time, they can each calculate the identical 6-digit code — without any network communication. This makes the system resistant to network interception, as long as the initial key exchange (usually via QR code) happens securely.
Why It Beats SMS-Based 2FA
Google Authenticator is a major upgrade over SMS-based two-factor authentication. SMS has real problems:
- It depends on active cellular reception
- Carrier delays can mean codes arrive minutes late
- It’s vulnerable to SIM-swapping attacks
Google Authenticator runs entirely on the device, with no network needed. That means no carrier reliability issues, and no risk of remote SIM hijacking — making it both faster and more secure.
Setting Up Spring Boot Project with Google Authenticator:
Before writing code, it helps to understand the overall flow. This integration has two main phases: registration and verification.
During registration:
- Your Spring Boot backend generates a secure random secret key
- The key is stored securely in your database
- The user is shown a QR code containing the key
- The user scans it with Google Authenticator, linking their device
During verification (e.g., login):
- The user reads the current 6-digit code from their app
- They submit it to your Spring Boot server
- The server calculates the expected code using the stored secret key and current time
- If the codes match, access is granted
Add Authenticator Dependency
In your Spring Boot project’s pom.xml file, add the Authenticator SDK dependency. You can find the latest version on the Authenticator Maven Repository.
Add this dependency to your project pom.xml file.
<dependency>
<groupId>de.taimos</groupId>
<artifactId>totp</artifactId>
<version>1.0</version>
</dependency>
<dependency>
<groupId>com.google.zxing</groupId>
<artifactId>core</artifactId>
<version>3.3.0</version>
<scope>compile</scope>
</dependency>
<dependency>
<groupId>com.google.zxing</groupId>
<artifactId>javase</artifactId>
<version>3.3.0</version>
<scope>compile</scope>
</dependency>"
Generate Secret Key
public static String generateSecretKey() {
	SecureRandom random = new SecureRandom();
	byte[] bytes = new byte[20];
	random.nextBytes(bytes);
	Base32 base32 = new Base32();
	return base32.encodeToString(bytes);
}
Generate Authenticator QR
private static final String ENCODED_SPACE = "%20";
private static final String PLUS_SYMBOL = "+";
public static String generateAuthenticatorQR(email, secretKey, accountName) {
	try {
		String barCodeUrl = getGoogleAuthenticatorBarCode(secretKey, email, accountName);
		return createQRCode(barCodeUrl);
	} catch (Exception e) {
		System.out.println("Error while generating the Authenticator QR code " + e.getMessage());
	}
}
private static String getGoogleAuthenticatorBarCode(String secretKey, String account, String issuer) {
	try {
		String utf8 = "UTF-8";
		return "otpauth://totp/"
				+ URLEncoder.encode(issuer + ":" + account, utf8).replace(PLUS_SYMBOL, ENCODED_SPACE)
				+ "?secret=" + URLEncoder.encode(secretKey, utf8).replace(PLUS_SYMBOL, ENCODED_SPACE)
				+ "&issuer=" + URLEncoder.encode(issuer, utf8).replace(PLUS_SYMBOL, ENCODED_SPACE);
	} catch (UnsupportedEncodingException e) {
		throw new IllegalStateException(e);
	}
}
public static String createQRCode(String barCodeData) {
	try{
		String filePath = "QRCode.png";
		int qrCodeImageHeight = 400;
		int qrCodeImageWidth = 400;
		BitMatrix matrix = new MultiFormatWriter().encode(barCodeData, BarcodeFormat.QR_CODE,
				qrCodeImageWidth, qrCodeImageHeight);
		FileOutputStream out = new FileOutputStream(filePath);
		MatrixToImageWriter.writeToStream(matrix, "png", out);
		File img = new File(filePath);
		byte[] imgBytes = FileUtils.readFileToByteArray(img);
		return "data:image/PNG;base64," + Base64.getEncoder().encodeToString(imgBytes);
	} catch (Exception e) {
		System.out.println("Error while creating the Authenticator QR code "+ e.getMessage());
	}
	return "Failed to generate QR";
}
When you generate the QR code using the ZXing library (as demonstrated in the code snippet above), paying close attention to the “issuer” and “account” string parameters is vital for a polished end-user experience. When a user scans the QR code, the Google Authenticator app uses these two parameters to label the newly created token in their list. If you leave these fields generic, the user will see a confusing, unlabeled 6-digit code and won’t know which application it belongs to. By properly formatting the issuer as your company or application name (e.g., “Innostax”) and the account as the user’s specific email address, you ensure the token is clearly identifiable, preventing confusion for users who manage dozens of different TOTP tokens on a single device.
To verify the TOTP
To verify the TOTP from google authenticator app need to pass secret Key generated in step 1
When implementing the verification logic in a production Spring Boot environment, you must account for a concept known as “time drift” or “clock skew.” Because the TOTP algorithm strictly relies on both the server and the client device having the exact same time, minor discrepancies can cause perfectly valid codes to be rejected. A user’s smartphone clock might be 45 seconds slower than your server’s clock. To gracefully handle this, robust implementations typically validate not only the code for the exact current 30-second time window, but also the codes for the immediate previous and next time windows. This creates a slightly wider margin of error (usually +/- 30 seconds), vastly improving the user experience by reducing frustrating false-negative rejections while still maintaining strict cryptographic security.
public static String getTOTPCode(String secretKey) {
	Base32 base32 = new Base32();
	byte[] bytes = base32.decode(secretKey);
	String hexKey = Hex.encodeHexString(bytes);
	return TOTP.getOTP(hexKey);
}
Handling Lost Devices
One often-overlooked issue: what happens when a user loses their phone? Since TOTP codes are generated locally, a lost or destroyed device can permanently lock a user out. The fix is recovery codes. When a user sets up their authenticator, generate 8-10 static, single-use codes. Instruct the user to print them or store them in a password manager.
Important: hash these recovery codes just like passwords in your database. They grant direct access past the MFA layer, so they need the same level of protection.
Preventing Brute-Force Attacks
Rate limiting matters here too. A TOTP code is just a 6-digit number — only a million possible combinations. Without rate limiting, an attacker could script thousands of guesses against your endpoint until one lands within the current 30-second window.
To prevent this, enforce a strict limit on failed attempts. A common approach: lock the account or add an exponential delay after 3-5 consecutive failed TOTP submissions.
Conclusion
In conclusion, MFA stands as a key in modern software development across various industries. From banking software development to medical software development and beyond, its adoption reflects a dynamic approach to cybersecurity in an increasingly linked digital landscape.
Two-factor authentication is an important step toward protecting your digital identity, credentials, and login information for personal and financial accounts. Google authenticator account details make it simple to configure and use two-factor authentication for all types of accounts.
To learn more about Google Authenticator and its capabilities, check out their Wikipedia page.
For additional insightful articles and information on custom software development services, please reach out to us.