Blog Articles
Mastering Navigation in React Native: A Comprehensive Guide
Table of Contents
In the ever-evolving landscape of custom software development, creating seamless and intuitive navigation experiences for users across platforms is paramount. When it comes to building robust mobile applications, React Navigation emerges as a powerful tool, offering a plethora of features for crafting navigation solutions that cater to diverse business domains such as financial services, healthcare, and more.
Understanding React Navigation
What is React Navigation?
React Navigation is a JavaScript library for routing and navigation in applications. It facilitates the creation of fluid and dynamic navigation flows, allowing developers to manage navigation states effortlessly. Whether you’re developing an iOS mobile app or an Android app, React Navigation proves to be a versatile and efficient choice.
Key Features
- Cross-Platform Compatibility: React Navigation excels in providing a consistent experience across various platforms, making it an ideal choice for cross-platform mobile app development services.
- Customization: Tailor navigation to your application’s needs with extensive customization options. Define unique transitions, animations, and gestures to create a branded user experience.
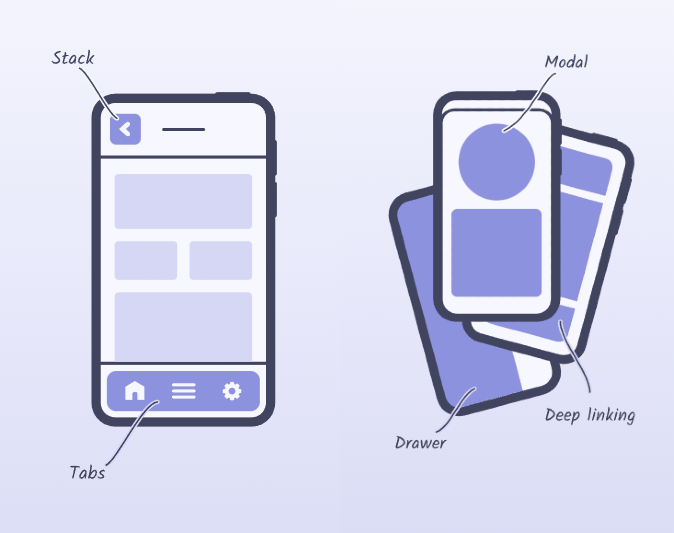
- Nested Navigation: Handle complex navigation scenarios with ease by implementing nested navigation structures. This feature proves beneficial in scenarios like building comprehensive dashboards or multi-level navigation.
- Tab Navigation: Implement tab-based navigation effortlessly, a common pattern in mobile applications. It simplifies the creation and customization of tab-based interfaces.
- Stack Navigation: Manage navigation using a stack-based approach, allowing smooth transitions between screens. This is particularly useful in scenarios where users move forward and backward through a linear flow.
- Drawer Navigation: Integrate intuitive drawer navigation patterns for seamless access to various sections of your application. React Navigation simplifies the implementation of side menus for a polished user experience.
Integration Steps
Now, let’s delve into the integration steps to kickstart your journey with React Navigation:
Step 1: Installation
Begin by installing it using the following command:
|
1 |
npm install @react-navigation/native @react-navigation/stack |
Install dependencies in your react-native project by using the following command:
|
1 |
npm install react-native-screens react-native-safe-area-context |
For running the application on ios run the following command:
|
1 |
npx pod-install ios |
Update the MainActivity.java file located at android/app/src/main/java/<your package name>/MainActivity.java to properly setup the app for android.
|
1 2 3 4 5 6 7 8 |
public class MainActivity extends ReactActivity { // ... @Override protected void onCreate(Bundle savedInstanceState) { super.onCreate(null); } // ... } |
Step 2: Setup
Wrap the whole app in NavigationContainer and set up a basic navigation structure:
|
1 2 3 4 5 6 7 8 9 10 |
import * as React from 'react'; import { NavigationContainer } from '@react-navigation/native'; export default function App() { return ( <NavigationContainer> {/* Rest of your app code */} </NavigationContainer> ); } |
Creating a native stack navigator
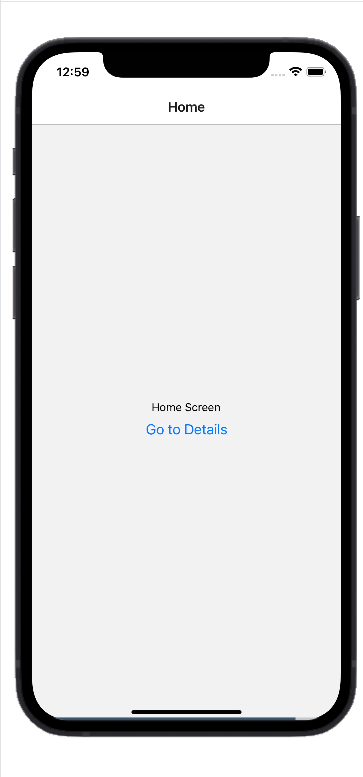
Step 3: Navigation Actions
Utilize navigation actions to navigate between screens programmatically. For instance, to navigate from the “Home” screen to the “Details” screen:
Going Back
The top part of your app’s screen usually has a back button when you can go back to the previous screen. If there’s just one screen and nowhere to go back to, there won’t be a back button.
If you want to make the back button work without the user tapping it, you can make it happen with code using navigation.goBack().
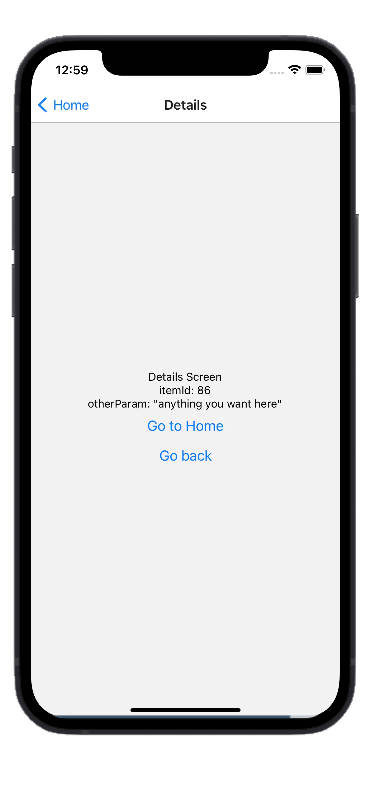
Passing parameters to routes
This involves two steps:
- To send information to another screen, use the navigation.navigate function with a second object parameter like this: navigation.navigate(‘RouteName’, { /* your information here */ }).
- In the screen component, access the received information using route.params.
With these basic steps, you’ve set up a foundation for navigation in your React Native application using React Navigation.
Conclusion
In conclusion, React Navigation stands out as a reliable solution for crafting navigation experiences that align with the requirements of diverse industries. Whether you’re involved in custom financial software development, healthcare software development, or any other sector, mastering it can significantly enhance the user experience of your applications. As technology continues to advance, staying abreast of powerful tools like React Navigation is essential for delivering top-notch solutions.
By incorporating React Navigation into your toolkit, you’re not just building navigation – you’re crafting seamless journeys for your users, irrespective of the platform they choose. As the demand for cross-platform app development services continues to rise, it remains a valuable asset for developers aiming to create cutting-edge mobile applications.

Get a Fast Estimate on Your Software Development Project
We are committed to delivering high-quality IT solutions tailored to meet the unique needs of our clients. As part of our commitment to transparency and excellence, we provide detailed project estimations to help our clients understand the scope, timeline, and budget associated with their IT initiatives.
Share


Related Post