


Setting up a Shopify store is relatively straightforward, but launching it successfully takes more than adding products and choosing a theme. Before sending customers to the store, make sure your domain, policies, checkout, SEO settings, analytics, and customer notifications are all working properly. A few extra checks before launch can save you from fixing avoidable problems after customers start placing orders.
- 1 Sign up for a Shopify account, choose a store name, and answer essential business questions to tailor your setup experience.
- 2 Add and organize products with detailed descriptions, images, and collections to enhance discoverability.
- 3 Customize your store's theme, configure payment and shipping options, and conduct a test checkout before removing the password and launching your store.
- 4 Preview on a real mobile device, not just a resized browser — most Shopify traffic is mobile, and that catches layout issues a resize won't.
- 5 Place one real test order after launch, not just before. The Bogus Gateway checks setup; a live order confirms production actually works.
It is not a difficult task to start an online store using Shopify, and the following tutorial guide will take you through basic steps in getting started from creating your Shopify store account to launching your store.
Page 1: Create Your Shopify Store Account
To get started, you need to sign up for a Shopify account.
1. Register
Navigate to Shopify Shopify and sign up for a free trial. All you will be asked for is your email address, a password, and your name for your store. Once your account is created, you’ll be taken directly to your Shopify admin.
2. Choosing Your Store Name
Your store name will become your domain name automatically (e.g., mystore.myshopify.com). You can always change it later when you buy a custom domain.
3. Answer Basic Business Questions
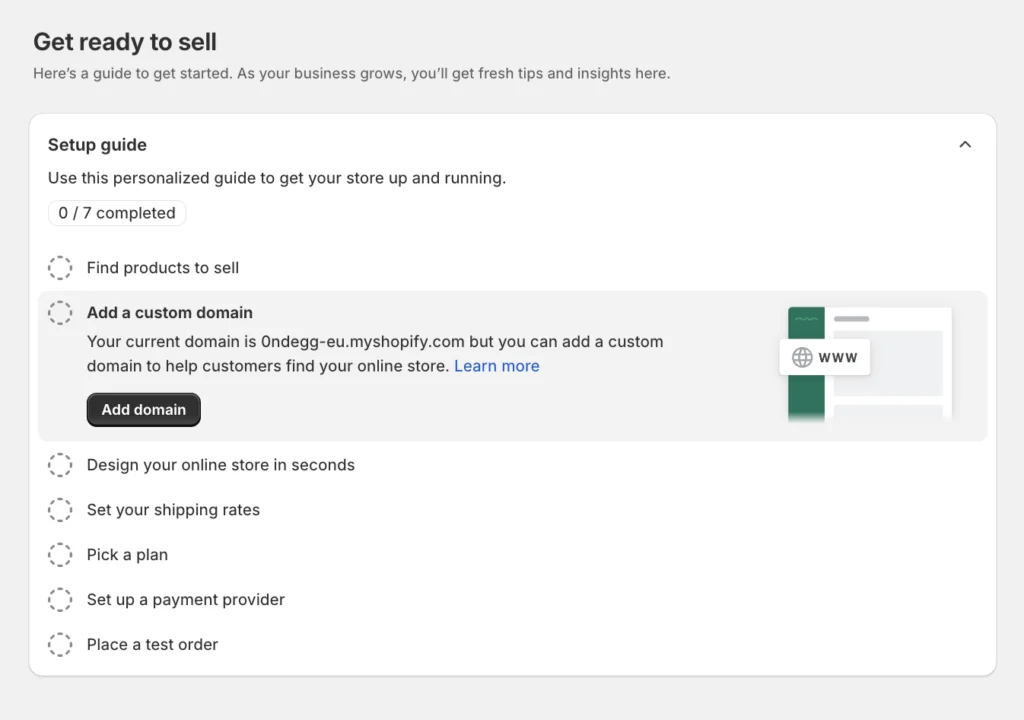
You will be asked a few questions about your business after signing up for example how much revenue you make currently or whether you are selling any products. These help with tailoring your setup experience.
Page 2: Setting Up Your Store Preferences
After the account creation, it’s time to personalize your store settings.
1. Set Up Store Details
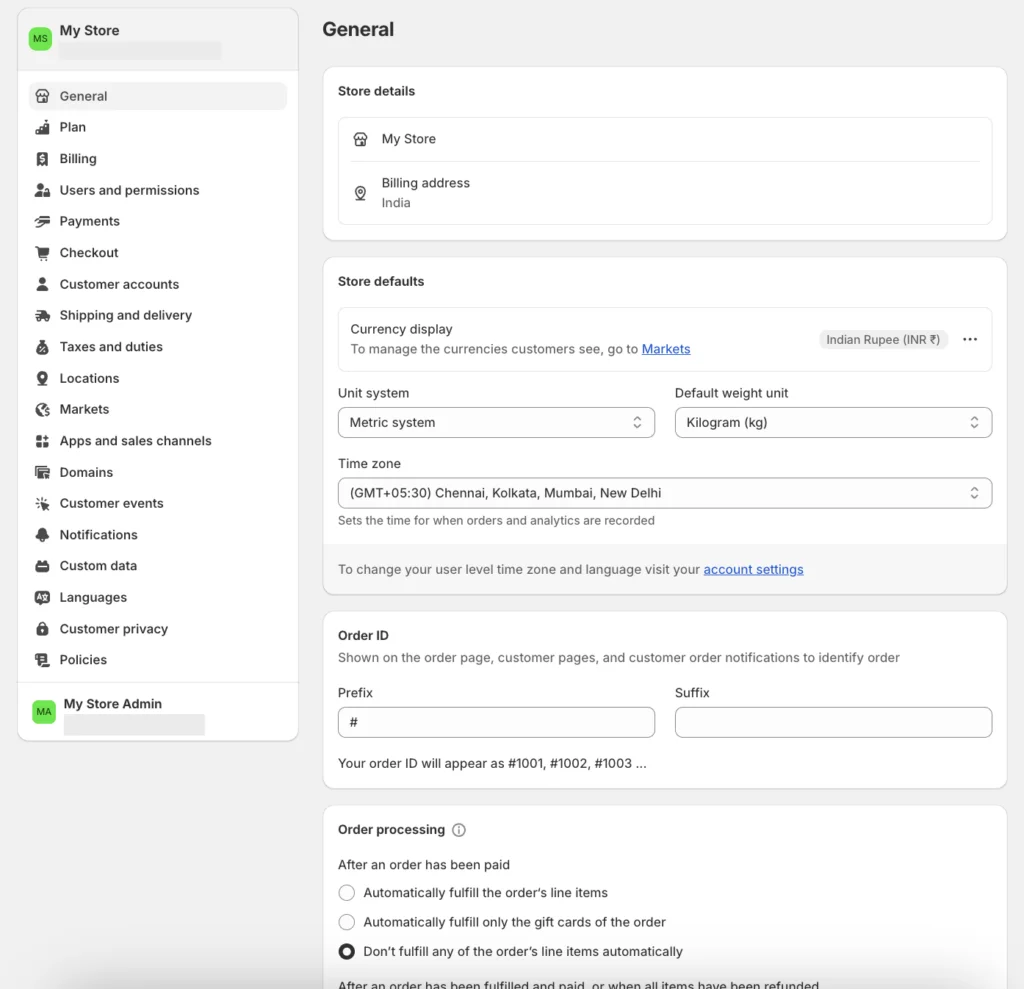
To begin, set up your store details. Go to Settings > General to configure your store details.
- Store name
- Legal business name
- Store currency
- Contact information (email and phone number)
2. Store Language and Time Zone
Under the same settings area, you’ll also be able to set default language and time zone. Ensure these suit your customers.
Page 3: Add and Organize Products
Now that we have the basic store setup, it’s time for the products.
1. Add a Product
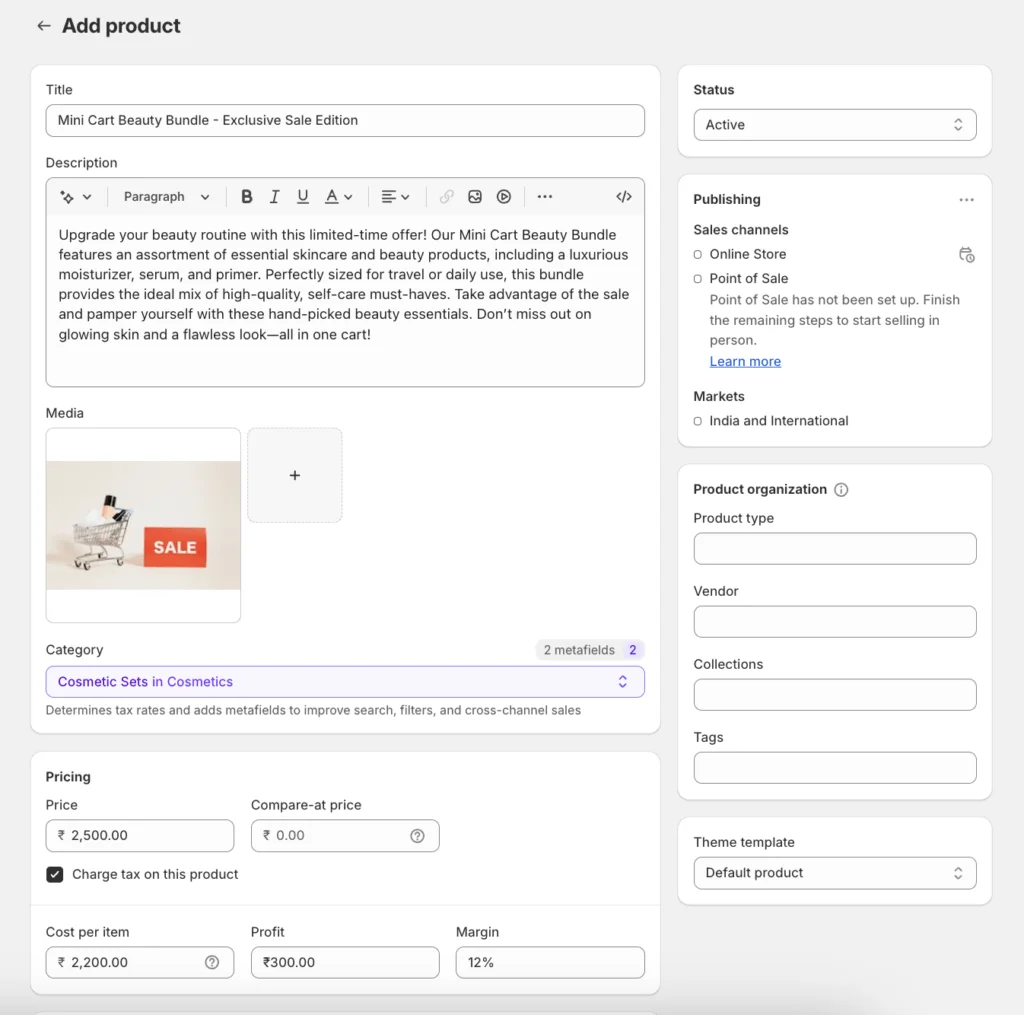
Under Products in the Shopify admin you select “Add Product.” You’ll then have to fill in the following fields of information:
- Product title
- Description: Describe the benefits and features of the product.
- Images: Upload product high-quality images.
- Price: Set the price for your product.
- Inventory: Track stock using SKU (stock-keeping units).
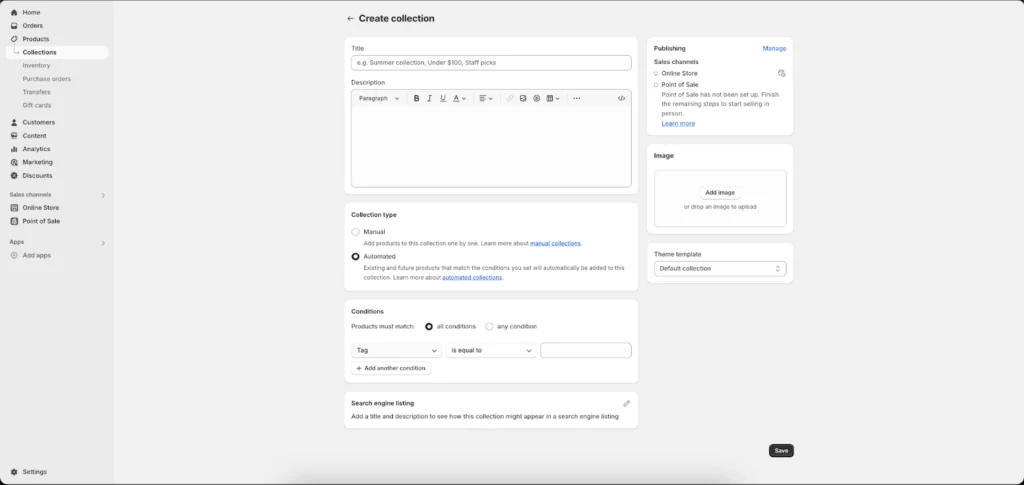
2. Organize Products into Collections
A set of products which you might group to make it easier to navigate (e.g., “Summer Collection”). Create collections based on product types, seasonality, or other characteristics.
3. Use Tags
Tags can also help you make your products more discoverable. Add relevant tags and chances of those specific products getting discovered by the customers will increase.
Page 4: Customize Your Shopify Store Theme
The appearance and feel of your store are the things that are going to attract these customers. Shopify offers free and premium themes for you to use.
1. Choose a Theme
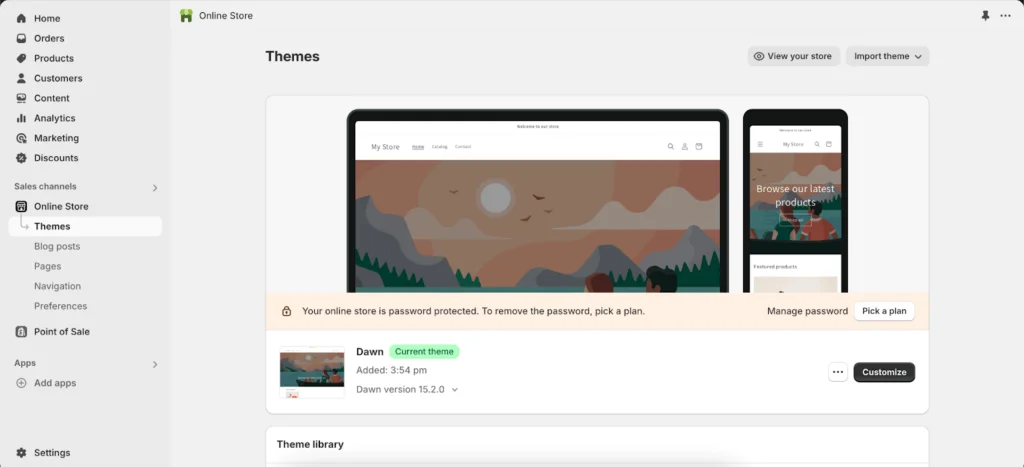
Go to Online Store > Themes and scroll through the free and paid themes available. Once you have chosen the theme, click the “Customize” button.
2. Customize Your Theme
You can customize the layout, colors, fonts, etc. from the theme editor. Make sure your store looks visually representative of your brand. For detailed information visit – Customizing Your Shopify Theme Using Liquid
3. Add a Logo and Favicon
Upload your business logo to give a professional look. You can also upload a favicon. It’s a small image that appears in the browser tab under Online Store > Preferences.
Page 5: Configure Payments and Shipping
Setting up payment gateways and shipping options is important to ensure smooth functioning of your store.
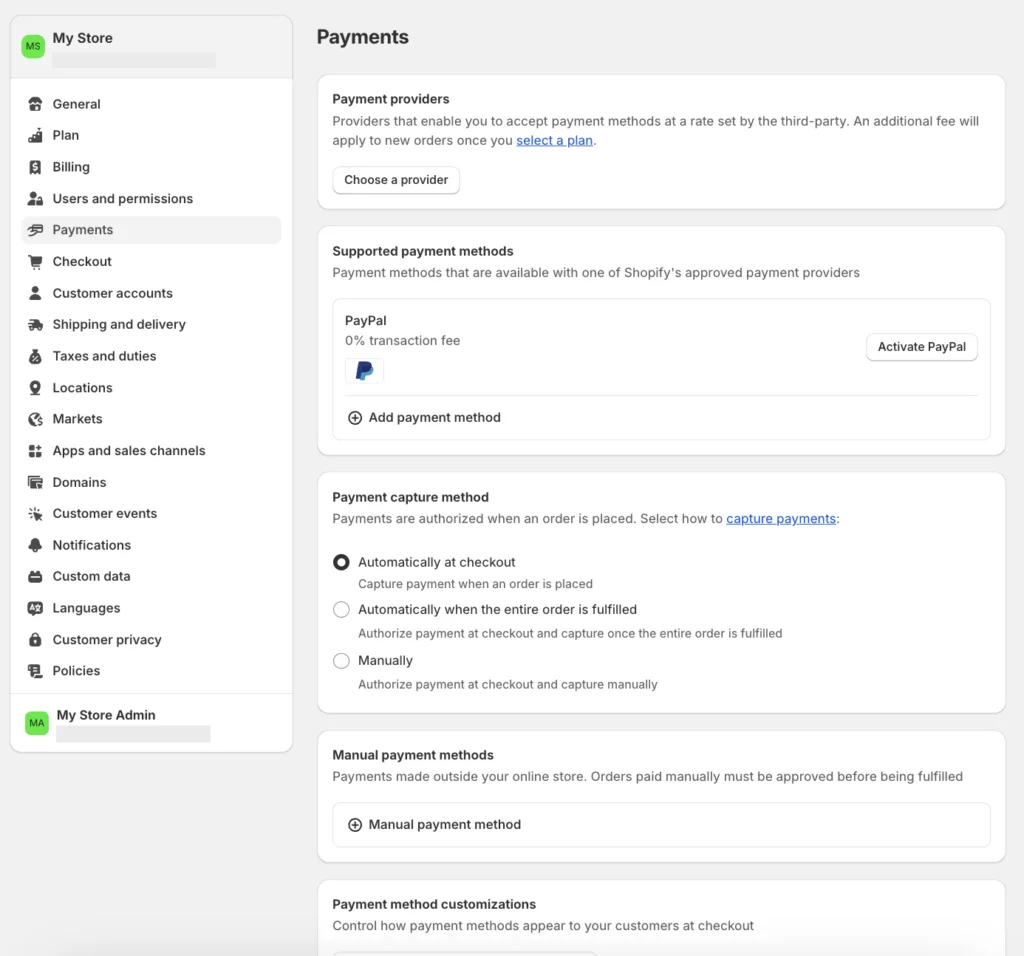
1. Set Up Payments
Shopify has collaborated with multiple payment providers. You can use Shopify Payments (no additional transaction fee) or third-party gateways, such as PayPal, Stripe, etc.
- To set up your chosen payment provider, go to Settings > Payments
- You can have a review of all the credit card payment settings, digital wallets, or manual options such as COD etc.
2. Set Shipping Rates
Navigate to Settings > Shipping and Delivery to set your shipping options. You can specify:
- Flat rates: A flat rate per order.
- Real-time shipping: Use of carrier-calculated rates from USPS, FedEx etc.
- Free shipping: Offering free shipping as an incentive for customers to place their order.
3. Add Shipping Zones
Define the zones from which you will ship your products. It could be some specific country or region. You can specify different rates based on zones.
Page 6: Review and Launch Your Store
Before you go live with your Shopify store go through the fine print and settings to make sure everything is working right.
1. Preview Your Store
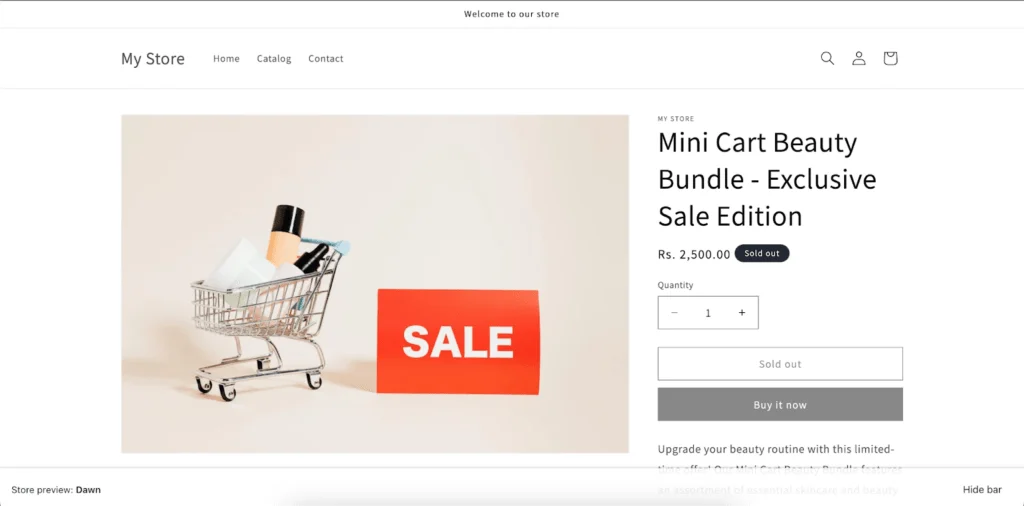
Shopify preview your store just so you can see how it looks on a desktop or mobile device. Navigate to Online Store > Themes and click View your store.
2. Test Your Checkout
Test checkout using test order Make sure the checkout is seamless by making a test order. This can be done by utilizing Shopify’s “Bogus Gateway” within the Payments section in order to simulate a payment without using live credit card information.
3. Remove the Store Password
Your store, by default, has a password created for it during the initial setup. The easiest way to make your store public is by navigating to Online Store > Preferences and then disable the password.
4. Launch Your Store
Set everything up and then click the remove password button, and your store is live for customers to shop in!
What to Set Up Before You Start Promoting Your Store
While your store might be operational, this does not guarantee that it is good to run a marketing campaign just yet. Before investing in advertising efforts and making any announcements about your site launch, use a couple of minutes to double-check all the details that would matter to your visitors.
It would be wise to make sure that your contact information, product descriptions (which should provide the answers to the questions customers might have regarding their purchases), as well as your return and shipping policies are correct.
These aspects may not seem particularly interesting; however, they are the first thing your customers would pay attention to in case of problems.
Connect a Custom Domain
The default Shopify domain can be of help during the initial set-up but most of the times, it won’t suit any of the existing businesses. The reason for this is simple: the domain name that reflects your brand is more memorable and tends to create a higher sense of credibility when shown to people via advertising and other means of communication such as emails.
It is important to verify the right format of the URL that opens up your website along with the use of HTTPS protocol. It is also necessary to change your branded email address at the same time so that the users get notifications regarding their order from the address they expect.
Finally, before launching the site, it is recommended to perform tests using the domain name on both desktop and mobile devices ensuring that all the necessary pages open without problems – from the product page to the checkout page and also making sure that all buttons work perfectly.
Add Your Store Policies
Consumers will always want to know what happens in case there is damage in delivery, in case they change their minds, or in case products do not fit. Policies create clarity before consumers make the decision to purchase anything.
The minimum would be to examine your return and refund policy, shipping policy, privacy policy, and terms of service. This should be done to ensure that the policies match your way of doing business and are not just copies of standard policies for businesses that sell different products from yours or are located elsewhere.
Policies should be easy to locate in places such as footers, product pages, and at checkout time.
Don’t Ignore Shopify SEO Settings
It is not necessary to master all SEO techniques prior to launching, but certain elements of optimization must be taken care of before the site attracts organic visitors.
Check out your page titles and meta descriptions, give descriptive names to products, write informative product descriptions, and make your URLs logical. Product images must also have descriptive alt tags where possible.
But more importantly, write for your customers. A keyword-packed product description will not do anything if it does not tell people why they must buy the product.
Set Up Analytics Before the First Sale
One of the most common mistakes one can make is leaving the issue of tracking for after the launch. Before launching, configure basic analytics to see where visitors come from and how they behave inside the store.
Connect those marketing and analytical instruments you are going to use to each other before you send traffic to the store. This will help you see from where visitors come and how they behave on the site.
Even minimum information can be helpful. For example, you can see that hundred visitors look at some product page but only several put the product into the shopping cart. Without tracking tools, all your decisions will be based on assumptions only.
Conclusion: Your Shopify Store Is Ready
You’ve followed all these steps, creating, customizing, and launching your Shopify store. It is now ready to hit on selling online. Continue to dig around for any features of Shopify that you can use to enhance your store, like apps, marketing campaigns, or sales analyses data.
To learn more about Shopify and its capabilities, check out their official website here. For additional insightful articles and information, please reach out to us.