- 1 Integrating Paytm into a ReactJS app involves setting up a developer account, obtaining API keys, and configuring the Paytm payment module to enable seamless transactions.
- 2 The integration includes creating a "Pay Now" button and using the Paytm modal for checkout, enhancing user experience by providing a streamlined and secure payment process.
- 3 After coding the payment functionality, the PaytmButton component should be tested within the app to ensure a smooth and reliable payment process, suitable for e-commerce and financial services applications.
Seamless online transactions are essential in today’s e-commerce and financial services software. Payment gateways play a critical role in providing secure and efficient processing for customers, and payment gateway integration in React JS has become a common task for developers, especially those in industries like travel software. Integrating gateways like Paytm Payment Gateway further enhances the process, ensuring smooth and reliable transactions.
Paytm’s payment gateway is popular due to its simplicity and effectiveness. This guide breaks down the process of integrating Paytm with a ReactJS application into clear, manageable steps, making it easy for developers to follow and implement.
How to Integrate Paytm Payment Gateway using ReactJS
Step 1: Create a new Paytm developer account
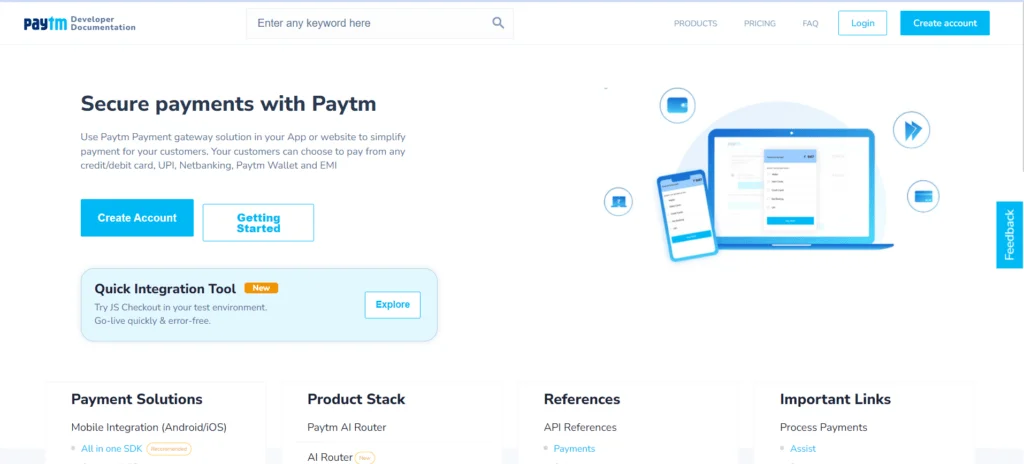
We would need to create new secret keys by creating a new developer account. Go to https://developer.paytm.com/, login if you are already a Paytm user, or you can create a new account for payment gateway integration.
Step 2: Collect the API keys
Upon successful login, proceed directly to the Dashboard and verify the Test API Details. Feel free to test the APIs using the test API keys.

create-react-app < app - name >
Create a new project with the default folder structure as shown below.

Adding the scripts to index.html
You need to link the Paytm library using the script tag in public/index.html file. For that use the below snippet.
<script
type="text/javascript" crossorigin="anonymous" src="https://securegw-stage.paytm.in/merchantpgpui/checkoutjs/merchants/.js"
>
< /script >
Logic & UI: Paytm Payment Integration
Create a new file paytmButton.js inside /paytm-button folder. This file will contain the main logic and functionality for the Paytm payment gateway integration using ReactJS.
The user interface would have a “Pay Now” button that will trigger the Paytm checkout modal. Create a new function named initializePaytm() that will encompass all the initialization configurations and token generation steps. Trigger this function on page load using useEffect.
useEffect(() => {
   initialize();
 }, []);
The initializePaytm() function will make use of the Paytm checksum file and it will generate a token.
const initialize = () => {
   let orderId = "Order_" + new Date().getTime();

   // Sandbox Credentials
   let mid = ""; // Merchant ID
   let mkey = ""; // Merchant Key
   var paytmParams = {};

   paytmParams.body = {
     requestType: "Payment",
     mid: mid,
     websiteName: "WEBSTAGING",
     orderId: orderId,
     callbackUrl: "https://merchant.com/callback",
     txnAmount: {
       value: 100,
       currency: "INR",
     },
     userInfo: {
       custId: "1001",
     },
   };

   PaytmChecksum.generateSignature(
     JSON.stringify(paytmParams.body),
     mkey
   ).then(function (checksum) {
     console.log(checksum);
     paytmParams.head = {
       signature: checksum,
     };

     var post_data = JSON.stringify(paytmParams);

     var options = {
       /* for Staging */
       // hostname: "securegw-stage.paytm.in" /* for Production */,

       hostname: "securegw.paytm.in",

       port: 443,
       path: `/theia/api/v1/initiateTransaction?mid=${mid}&orderId=${orderId}`,
       method: "POST",
       headers: {
         "Content-Type": "application/json",
         "Content-Length": post_data.length,
       },
     };

     var response = "";
     var post_req = https.request(options, function (post_res) {
       post_res.on("data", function (chunk) {
         response += chunk;
       });
       post_res.on("end", function () {
         console.log("Response: ", response);
         // res.json({data: JSON.parse(response), orderId: orderId, mid: mid, amount: amount});
         setPaymentData({
           ...paymentData,
           token: JSON.parse(response).body.txnToken,
           order: orderId,
           mid: mid,
           amount: 100,
         });
       });
     });

     post_req.write(post_data);
     post_req.end();
   });
 };
Explanation
- Call this method on page load to obtain a transaction token from Paytm, which will later be used to initiate the Paytm checkout modal.
- To retrieve the token, we will make an API call to /theia/api/v1/initiate transaction which will expect a basic transaction object in the request body along with a hashed value created using the transaction object. The paytmParam.body is a transaction object with basic fields like orderId, value, and currency.
paytmParams.body = { ... };
A hash value should be using this transaction object. For that, Paytm provides a library – PaytmChecksum using which we can generate a hashed value by passing the transaction object as arguments.
PaytmChecksum.generateSignature(
JSON.stringify(paytmParams.body),mkey ).then(function(checksum){ ... // logic };- Send this hash value along with the transaction object in the initiateTransaction API. The API will provide the transaction token in response. Later, use this token when the user clicks on the ‘Pay Now’ button to trigger the payment checkout modal.
Create a new function called makePayment() that will be triggered on the button click. This function will utilize the previously generated token and display the checkout modal to the user. In this function, you can modify the style of the Paytm checkout modal and change the color code and add your logo.
const makePayment = () => {
        var config = {
            "root":"",
            "style": {
              "bodyBackgroundColor": "#fafafb",
              "bodyColor": "",
              "themeBackgroundColor": "#0FB8C9",
              "themeColor": "#ffffff",
              "headerBackgroundColor": "#284055",
              "headerColor": "#ffffff",
              "errorColor": "",
              "successColor": "",
              "card": {
                "padding": "",
                "backgroundColor": ""
              }
            },
            "data": {
              "orderId": paymentData.order,
              "token": paymentData.token,
              "tokenType": "TXN_TOKEN",
              "amount": paymentData.amount /* update amount */
            },
            "payMode": {
              "labels": {},
              "filter": {
                "exclude": []
              },
              "order": [
                  "CC",
                  "DC",
                  "NB",
                  "UPI",
                  "PPBL",
                  "PPI",
                  "BALANCE"
              ]
            },
            "website": "WEBSTAGING",
            "flow": "DEFAULT",
            "merchant": {
              "mid": paymentData.mid,
              "redirect": false
            },
            "handler": {
              "transactionStatus":
function transactionStatus(paymentStatus){
                console.log(paymentStatus);
              },
              "notifyMerchant":
function notifyMerchant(eventName,data){
                console.log("Closed");
              }
            }
        };

        if (window.Paytm && window.Paytm.CheckoutJS) {
       	window.Paytm.CheckoutJS.init(config).
then(function onSuccess() {
      window.Paytm.CheckoutJS.invoke();
}).catch(function onError(error) {
      console.log("Error => ", error);
});
}}
Call the makePayment() method on click event of the button.
return (
   < div >
     {loading ? (
       < img src="https://c.tenor.com/I6kN-6X7nhAAAAAj/loading-buffering.gif" / >
     ) : (
       < button onClick={makePayment}>Pay Now< /button >
     )}
   < /div >
 );
Import PaytmButton in App.js
After completing the main logic implementation, it’s time to import the file into App.js.
import "./App.css";
import { PaytmButton } from "./paytm-button/paytmButton";

function App() {
 return (
   < div >
     < PaytmButton / >
   < /div >
 );
}

export default App;
Run the Server
Finally, we have completed the tutorial on how to integrate the Paytm Payment Gateway using ReactJS. Now using the below command, run your server.
npm start
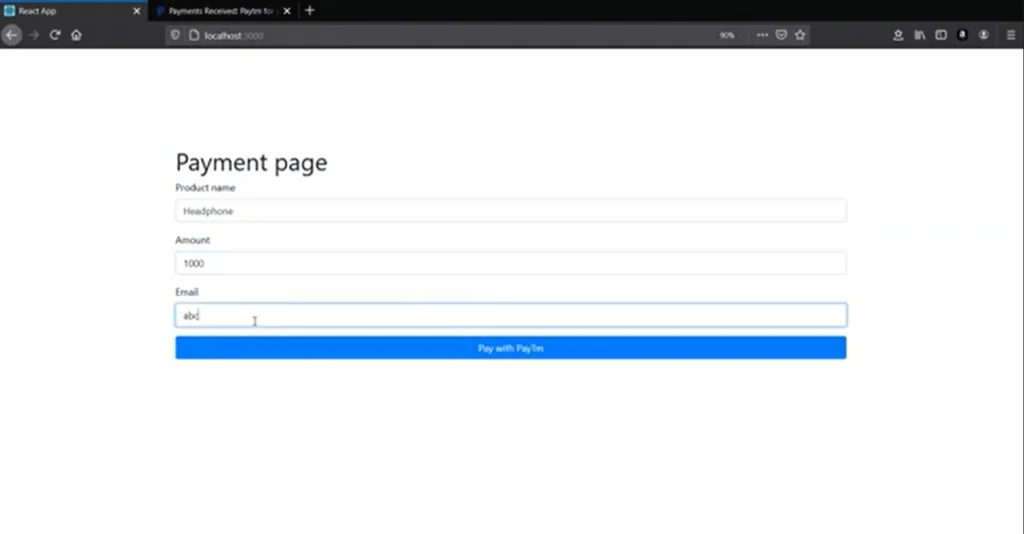
Visit http://localhost:3000/ and test the demo app.
Common Errors While Connecting Paytm and How To Avoid Them
A few common errors can occur when connecting Paytm. Developers should be aware of them before starting the integration.
One common mistake is creating an incorrect checksum. The checksum is the hashed signature sent with the transaction data to the Paytm API. The transaction object sent to Paytm must match the object used to create the checksum.
A difference in field order, formatting, or values can cause signature verification to fail. Even a small typo can lead to this error.
Another common issue is mixing staging and production keys. Paytm uses different merchant IDs and keys for testing and production. Using staging credentials for a real transaction, or production credentials for testing, can cause unexpected results.
The callback URL can also cause problems if it is not set up correctly. If the application does not handle the Paytm transaction response, it may show a success page while the actual order status remains unknown.
Testing the application in staging or development mode before launch can help avoid these issues. It can also help identify problems that occur when a user closes the payment window or when the connection between Paytm and the application is interrupted.
How To Handle Transaction Failures and Other Edge Cases
A payment system must handle more than successful transactions. The application should also have clear handlers for other cases.
First, plan how the application will handle failed transactions. A payment may fail because of insufficient funds, card rejection, or another reason.
Second, define what should happen when a user closes the payment popup. This should not be treated as either a successful or failed transaction because the final payment status may not be known.
Third, the backend should handle duplicate callbacks from Paytm. A connection may fail after a payment is completed, causing the application to request the status again. The same transaction should not be processed twice because this could lead to double-booking the order.
Additional Security Recommendations Beyond Paytm Integration Best Practices
Production applications need extra security measures to protect the business from fraud and keep transactions secure.
First, never expose Paytm keys in frontend code or the repository. Anyone who gets these keys could use them to start payments and potentially cause financial loss. Keep the keys in a secure location on the server. Only the backend should use them to initialize payments.
Second, verify the transaction amount on the server before starting a payment. A user may change the value in the URL or payment form before submitting it.
Third, log transactions and their results. Review these logs for suspicious patterns, such as many failed payment attempts. This can help prevent fraud before it causes damage to the business.
Why Webhook Reliability Matters More Than It Might Seem
Many production Paytm integrations also use server-to-server webhooks. These can provide a more reliable option than browser-based callbacks. Understanding the difference between these methods helps you choose the right approach for your application.
The callback flow depends on the user’s browser receiving the response. This can fail if the user closes the browser after payment, loses their network connection, or uses a browser extension that blocks the redirect.
A server-to-server webhook avoids these browser issues. Paytm’s servers send the transaction status directly to your backend. This happens regardless of what happens in the user’s browser.
This makes webhooks a more reliable source for confirming whether a payment was completed. An application that relies only on browser callbacks may have cases where the customer is charged but the order is not marked as paid.
Using webhook notifications for the main payment logic is more reliable. The browser callback can then be used for user-facing confirmation.
Planning for Scale as Transaction Volumes Grow
An integration that works well with a small number of transactions may need changes as the volume grows. It is better to plan for this early instead of waiting until the application handles tens or hundreds of transactions each day.
Database writes triggered by callbacks should be optimized and indexed. A slow database during payment confirmation can delay callback processing. This may create a backlog of payments during a sale or product launch.
You should also consider concurrency and race conditions. For example, a user may click the payment button twice. A retry may also start while an existing request is still being processed. Without proper safeguards, these cases could lead to duplicate charges.
Monitoring becomes more important as transaction volume grows. Monitoring should track average callback processing time, failure rates, and unusual increases in declined transactions. These changes may point to a problem with your application or with Paytm.
Why Innostax is Your Partner for Payment Gateway Integration and ReactJS Development
At Innostax, we know that smooth payment processing is important for e-commerce and financial services applications. Our team specializes in payment gateway integration with a focus on security, speed, and reliability.
Using solutions such as Paytm, we focus on secure transactions through high-level encryption, strict security protocols, and detailed error handling. This helps protect both businesses and their customers.
Our ReactJS development expertise also helps us build applications that can handle high transaction volumes. We focus on scalability and a smooth user experience to support future growth.
We stay up to date with the latest frameworks and best practices. This helps keep applications adaptable as technology and business needs change.
Innostax combines technical skills with a focus on quality. We provide tailored payment gateway integrations and full-featured ReactJS applications that are reliable, secure, and built for long-term success.
Conclusion
Integrating a payment gateway Paytm into a ReactJS application is a crucial skill for modern web development. Through this step-by-step guide, we’ve demystified the process and made it accessible for developers at all levels. We’ve seen how, with a clear understanding of the process and the right tools, we can successfully add a robust payment solution to our ReactJS project in just seven easy steps. As we continue to explore and innovate in the realm of e-commerce and financial services software development, such skills will only grow in importance. Whether you’re engaged in custom financial software development, heading an iOS mobile app development company, or focusing on software development for healthcare, this holds true. Remember, the journey of learning and improvement never ends. Keep exploring, keep implementing, and keep growing.